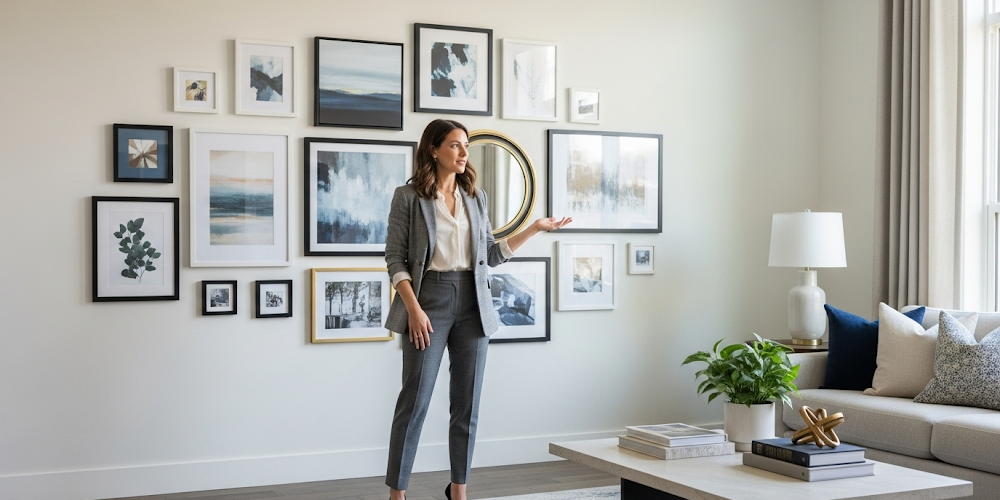
Creating stunning wall displays requires more than randomly hanging favorite pictures together on available wall space. Moreover, achieving gallery wall professional results demands understanding design principles that transform ordinary collections into cohesive, museum-quality displays. Interior designers spend years mastering these techniques that separate amateur attempts from sophisticated installations that command attention and admiration.
Recent interior design research shows that 91% of home visitors notice gallery walls within the first 30 seconds of entering a room. Furthermore, professionally designed gallery walls increase perceived home value by an average of 8% compared to poorly arranged or absent wall displays. These statistics highlight why mastering professional techniques becomes crucial for creating impressive living spaces.
Understanding fundamental design principles empowers anyone to create stunning displays regardless of budget constraints or artistic experience. Additionally, proper planning and execution ensure your investments in artwork and framing work together harmoniously rather than competing for attention throughout your carefully curated spaces.
Understanding Professional Gallery Wall Design Principles
The Foundation of Cohesive Visual Storytelling
Professional gallery walls tell stories through carefully curated artwork that shares common themes, colors, or emotional resonance throughout the entire display. Rather than displaying random collections, successful arrangements create narratives that guide viewers’ eyes naturally from piece to piece. Moreover, this storytelling approach ensures each individual artwork contributes to a larger, more impactful visual experience.
Cohesion doesn’t require identical pieces or perfect matching throughout your gallery wall professional display. Instead, focus on unifying elements like similar color palettes, complementary subject matters, or consistent emotional tones that connect diverse artworks into harmonious collections. Additionally, professional interior designers recommend limiting yourself to 2-3 dominant colors throughout the entire arrangement for optimal visual impact.
Consider your room’s existing decor and color scheme when planning gallery wall themes that enhance rather than compete with surrounding elements. Successful displays complement architectural features, furniture choices, and lighting conditions while maintaining their own distinctive character and visual presence.
Scale and Proportion Guidelines for Balanced Compositions
Proper scaling ensures individual pieces work together to create unified displays rather than competing collections of unrelated artwork. Large pieces anchor arrangements while smaller works provide supporting details that add visual interest without overwhelming the composition. Furthermore, varying sizes creates dynamic rhythm that prevents monotony while maintaining overall balance throughout the display.
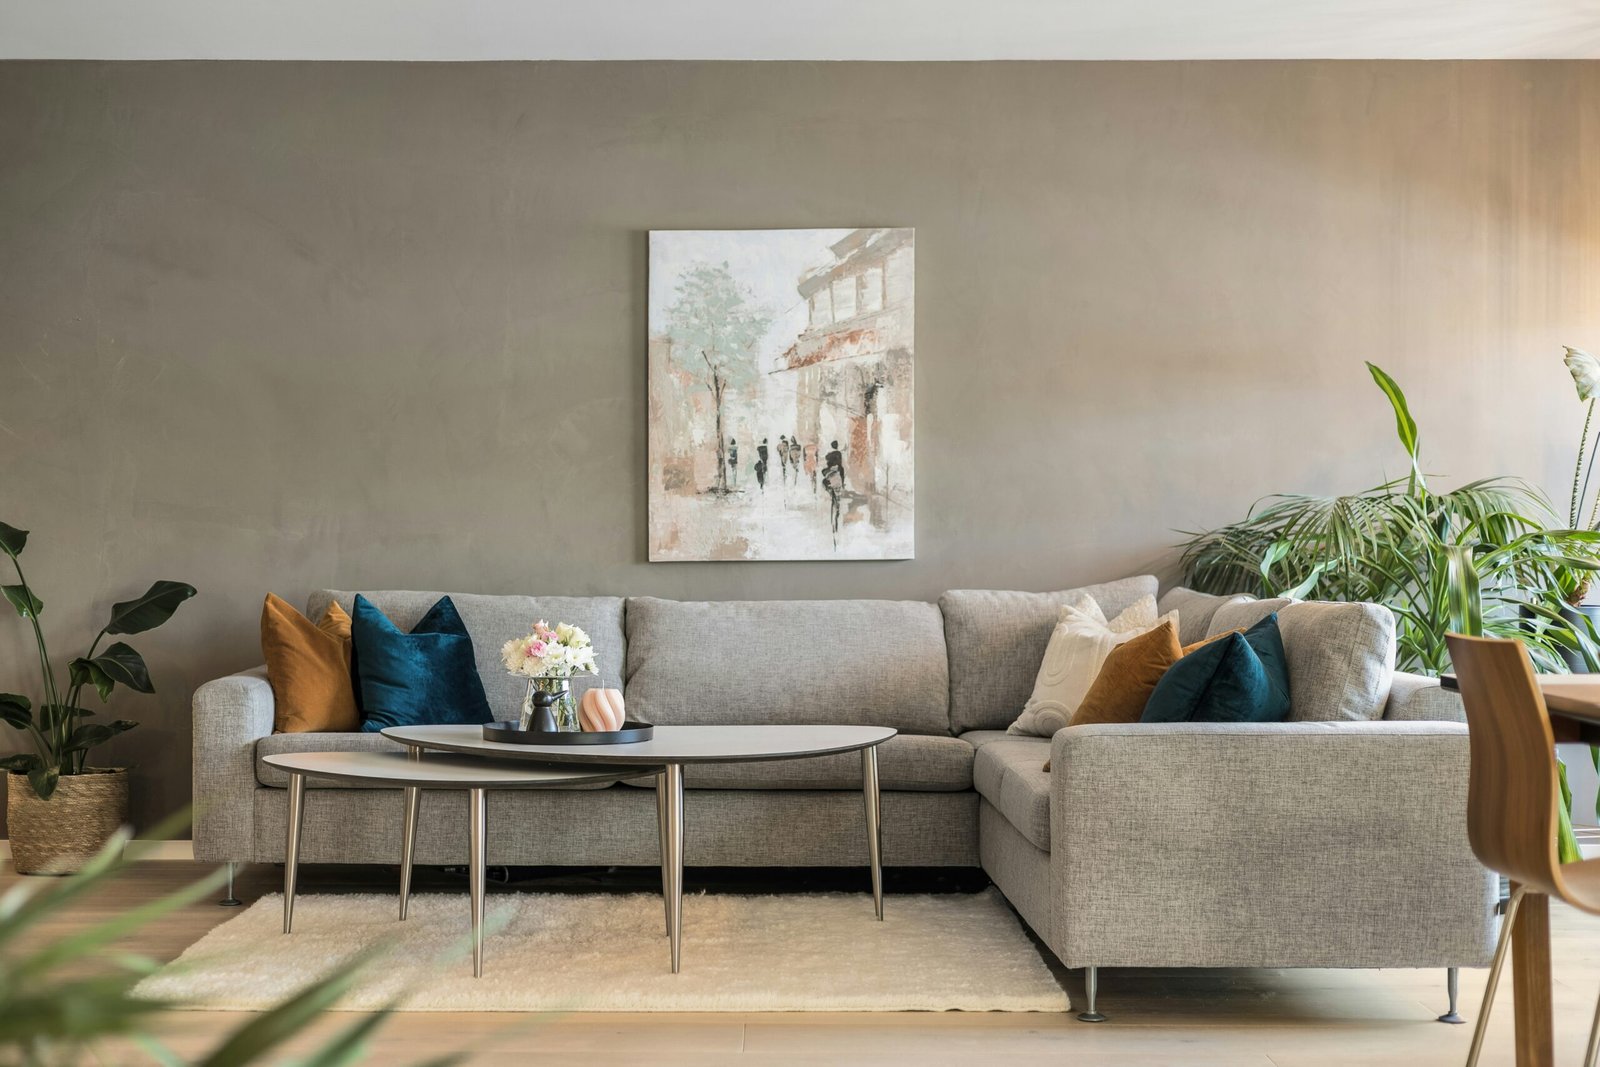
The two-thirds rule provides excellent guidance for gallery wall sizing relative to furniture placement. Above sofas, dining tables, or console tables, your gallery wall should span approximately two-thirds of the underlying furniture’s width. Additionally, consider ceiling height when planning vertical arrangements that draw eyes upward without overwhelming room proportions.
Leave adequate breathing room between individual pieces to prevent cramped appearances that diminish each artwork’s individual impact. Generally, maintain 2-3 inches between frames, adjusting slightly based on piece sizes and visual weight distribution throughout your professional arrangement.
Strategic Planning and Layout Design Techniques
Paper Template Method for Perfect Positioning
Professional designers always plan gallery wall layouts before committing to nail holes or wall damage through permanent installation attempts. Create paper templates matching your actual frame sizes, then experiment with arrangements on floors or tables until achieving perfect balance and visual flow. Moreover, this planning prevents costly mistakes while allowing unlimited experimentation with different configuration possibilities.
Tape paper templates to walls using removable adhesive for testing arrangements in actual lighting conditions and viewing angles throughout different times of day. This crucial step reveals how natural and artificial lighting affects your planned composition while ensuring optimal viewing from primary room positions.
Document successful arrangements with photographs before beginning installation to reference during hanging processes. Additionally, measure and mark template positions for accurate transfer to final artwork placement that maintains your carefully planned composition exactly.
Creating Visual Flow and Movement Patterns
Professional gallery walls guide viewers’ eyes naturally through deliberate arrangement patterns that create visual movement and sustained interest. Start with anchor pieces positioned at key focal points, then build surrounding elements that support and enhance these primary artworks effectively. Furthermore, consider how people typically move through your space when planning optimal viewing sequences.
Diagonal arrangements add energy and dynamism to gallery walls while preventing static, grid-like appearances that can feel rigid or institutional. However, balance dynamic elements with stable horizontal or vertical alignments that provide visual anchors throughout more energetic compositions.
Color placement significantly affects visual flow patterns within gallery wall professional displays. Distribute colors evenly throughout arrangements to prevent visual clustering that creates unbalanced weight distribution. Additionally, use your brightest or most vibrant pieces as focal points that draw attention to specific areas within larger compositions.
Frame Selection and Coordination Strategies
Unifying Diverse Artwork Through Consistent Framing
Consistent framing transforms eclectic artwork collections into cohesive gallery wall professional displays that appear intentionally curated rather than accidentally assembled. Choose frame styles, colors, and materials that complement your existing decor while providing neutral borders that highlight artwork rather than competing for attention.
Black frames offer timeless versatility that works with virtually any artwork style or color palette while providing strong definition that prevents pieces from visually bleeding together. Meanwhile, white or natural wood frames create lighter, more casual appearances that work well in contemporary or Scandinavian-inspired interiors.
Mix frame styles sparingly and intentionally to add visual interest without creating chaotic appearances. Limit yourself to 2-3 frame variations maximum, ensuring each choice serves a specific design purpose within your overall composition rather than introducing arbitrary variety.
Matting Techniques for Enhanced Visual Impact
Professional matting elevates artwork presentation while providing visual breathing room that prevents overcrowded appearances within gallery wall arrangements. White or cream mats work universally well because they create clean borders that highlight artwork while maintaining neutral backgrounds that won’t compete with surrounding pieces.
Consider varying mat sizes to create visual hierarchy within your gallery wall professional display. Larger mats around smaller artworks help them compete visually with larger pieces, while minimal matting on substantial works prevents them from appearing overwhelming within group arrangements.
Double matting adds sophistication and depth to artwork presentation while providing opportunities for subtle color coordination throughout your display. Use inner mat colors that pick up accent colors from artwork or room decor for enhanced cohesion between individual pieces and overall room design.
Installation Techniques for Professional Results
Proper Height and Spacing Guidelines
Professional installation requires precise height calculations that ensure comfortable viewing from typical room positions while maintaining visual connection with surrounding furniture and architectural elements. Standard gallery height places artwork centers at 57-60 inches from floor level, though adjustments may be necessary based on ceiling heights and room proportions.
Maintain consistent spacing between pieces throughout your gallery wall professional installation to create unified appearances rather than random clustering. Use spacers or measuring tools to ensure accurate distances that enhance rather than detract from your carefully planned composition.
Consider how furniture placement affects optimal viewing heights for your gallery wall arrangement. Artwork above seating areas may hang slightly lower than standard heights for comfortable appreciation from seated positions, while hallway displays can accommodate higher placements for standing viewers.
Hanging Hardware and Wall Protection Methods
Professional installations require appropriate hanging hardware that supports artwork weight safely while protecting walls from damage over time. Use picture hanging strips, hooks, or nails rated for specific weight ranges rather than assuming all hardware works for every piece.
Wall anchors become necessary for heavy pieces or installations in drywall locations without stud support. Additionally, distribute weight across multiple hanging points for large or valuable artworks that require extra security and stability throughout long-term display periods.
Consider future flexibility when selecting hanging methods that allow easy rearrangement without significant wall repair requirements. Adjustable hanging systems work particularly well for renters or those who enjoy updating arrangements seasonally throughout the year.
Color Coordination and Theme Development
Building Cohesive Color Palettes Across Multiple Pieces
Successful gallery wall professional displays rely on thoughtful color coordination that creates visual harmony without sacrificing individual artwork character. Analyze your existing pieces to identify common colors that can serve as unifying threads throughout the entire arrangement.
The 60-30-10 color rule applies effectively to gallery wall planning, with dominant colors appearing in approximately 60% of pieces, secondary colors in 30%, and accent colors providing 10% visual interest. This distribution creates balanced compositions that feel intentional rather than accidental.
Consider your room’s existing color scheme when selecting artwork that enhances rather than competes with surrounding decor elements. Pull colors from furniture, textiles, or architectural features to create cohesive relationships between your gallery wall and overall room design.
Thematic Approaches That Create Visual Interest
Professional curators often organize gallery walls around specific themes that provide intellectual and emotional coherence throughout diverse artwork collections. Travel photography, family portraits, or nature subjects create narrative threads that connect individual pieces into larger, more meaningful displays.
Abstract themes work particularly well for modern interiors where conceptual connections matter more than literal subject matter. Color relationships, geometric patterns, or emotional tones can provide unifying elements that create sophisticated displays without obvious thematic limitations.
Mix representational and abstract pieces thoughtfully to create visual variety while maintaining thematic coherence throughout your gallery wall professional arrangement. This approach prevents monotony while showcasing diverse artistic styles within unified presentations.
Lighting Considerations for Optimal Display Impact
Illumination Strategies That Enhance Artwork Visibility
Proper lighting transforms good gallery walls into spectacular focal points that command attention throughout day and evening hours. Natural light provides excellent illumination but requires UV protection to prevent artwork fading over time. Position displays perpendicular to windows when possible to minimize direct sunlight exposure.
Track lighting systems offer flexibility for illuminating multiple pieces while providing adjustable brightness control for different activities and times of day. LED options provide excellent color rendering without heat generation that could damage valuable artwork over extended periods.
Picture lights mounted above individual pieces create dramatic focal points while providing adequate illumination for detailed artwork appreciation. However, ensure consistent lighting throughout the entire gallery wall professional display to prevent some pieces from appearing dim compared to others.
Avoiding Glare and Shadow Issues
Position light sources to minimize glare on glass-covered artwork that could interfere with comfortable viewing experiences. Angle adjustable fixtures carefully to provide even illumination without creating harsh reflections that obscure artwork details or create uncomfortable viewing conditions.
Consider how furniture placement might create shadows that interfere with optimal artwork lighting throughout your gallery wall arrangement. Tall pieces or furniture positioned too close to walls can block light sources and create uneven illumination patterns.
Plan lighting installations before completing gallery wall arrangements to ensure optimal fixture positioning that complements your artwork layout rather than working against carefully planned compositions.
Maintenance and Evolution Strategies
Keeping Gallery Walls Fresh and Engaging Over Time
Professional gallery wall displays benefit from periodic updates that prevent staleness while maintaining overall design integrity. Plan seasonal rotations or annual refreshes that introduce new pieces while preserving successful core arrangements that anchor your display.
Document your gallery wall evolution with photographs that track changes and help you remember successful combinations for future reference. This documentation proves valuable when rearranging pieces or planning expansion opportunities within existing frameworks.
Consider modular approaches that allow easy piece substitution without complete reinstallation requirements. Standardized frame sizes or flexible hanging systems facilitate updates while maintaining professional appearance standards throughout changing arrangements.
Budget-Friendly Approaches to Professional Results
Achieve gallery wall professional results without expensive artwork investments through strategic thrift store shopping, DIY framing projects, and printable art resources that provide high-quality options at affordable prices.
Mix expensive statement pieces with budget-friendly finds to create sophisticated displays that maximize impact while controlling costs effectively. Photography prints, vintage posters, or repurposed materials can contribute significantly to professional appearances when properly framed and positioned.
Invest in quality framing for key pieces while using budget options for supporting elements that contribute to overall composition without requiring premium presentation materials. This strategic approach allocates resources efficiently while maintaining professional standards throughout your display.
Frequently Asked Questions
Professional gallery walls typically feature 5-15 pieces for optimal visual impact without overwhelming viewers. Odd numbers often create more dynamic arrangements than even groupings. Additionally, consider wall size and room scale when determining piece quantities that feel balanced rather than cramped or sparse.
Matching frames create cohesive, sophisticated appearances but aren’t strictly necessary for professional results. Limit frame variations to 2-3 styles maximum, ensuring each choice serves a specific design purpose. Moreover, consistent matting can unify diverse frame styles effectively throughout gallery wall professional displays.
Maintain 2-3 inches between frames as a general guideline, adjusting based on piece sizes and visual weight. Larger pieces can accommodate slightly more spacing, while smaller works should stay closer together. Furthermore, consistent spacing throughout the entire display creates unified appearances rather than random clustering.
Select pieces sharing common elements like color palettes, themes, or emotional tones while maintaining some variety for visual interest. Avoid overly matchy arrangements that appear catalog-like, instead focusing on harmonious relationships that create cohesive narratives throughout your professional display.
Conclusion
Creating gallery wall professional displays requires understanding fundamental design principles, careful planning, and attention to details that separate amateur attempts from sophisticated installations. Through proper scaling, thoughtful color coordination, and strategic arrangement techniques, anyone can achieve museum-quality results that enhance their living spaces significantly.
Success depends on patience, experimentation, and willingness to invest time in planning before installation begins. Start with basic principles and gradually develop confidence through practice and observation of professional examples. With dedication to proper techniques, your gallery wall will become a stunning focal point that reflects personal style while demonstrating sophisticated design sensibility.