Imagine walking into your home and feeling instantly transported to a cozy Moroccan café or a serene desert oasis. Now stop imagining – you can create that magical bohemian atmosphere yourself! Making your own boho prints isn’t just a budget-friendly decorating solution; it’s a rewarding creative journey that fills your space with personal meaning and artistic flair. Ready to discover how easy it is to craft Instagram-worthy wall art that perfectly captures your free-spirited personality?
Why DIY Boho Prints Are Taking Over Social Media
The DIY home decor market has exploded, with Pinterest reporting a 75% increase in searches for “boho DIY projects” over the past year. This surge isn’t surprising – creating your own bohemian prints offers incredible advantages that store-bought art simply cannot match.
Unlimited Customization: Unlike mass-produced prints, your DIY creations perfectly reflect your color preferences, size requirements, and personal style. Want sunset oranges to complement your living room? You’ve got it. Need a specific size to fit that awkward wall space? Consider it done.
Budget-Friendly Creativity: Professional boho prints can cost $50-200 each, while DIY versions typically cost under $20 to create. This dramatic cost difference allows you to fill entire walls with stunning artwork without breaking the bank.
Meaningful Personal Connection: Every brushstroke, color choice, and design element carries your creative energy. These aren’t just decorations – they’re extensions of your artistic soul that guests will notice and admire.
Essential Supplies: Your Boho Print Toolkit
Before diving into creation mode, gather these fundamental supplies that form the foundation of spectacular DIY boho prints:
Canvas and Paper Options: Choose from stretched canvases ($3-8 each), watercolor paper ($1-3 per sheet), or heavy cardstock ($0.50-1 per sheet). Canvas provides professional durability, while paper offers affordable experimentation opportunities.
Paint Selection: Acrylic paints work beautifully for beginners, with essential boho colors including terracotta, sage green, dusty rose, cream, and deep ochre. Watercolors create dreamy, flowing effects perfect for abstract designs.
Design Tools: Collect stencils, stamps, sponges, and brushes of various sizes. Natural sea sponges create authentic textural effects, while flat brushes handle broad color washes elegantly.
Finishing Materials: Mod Podge seals your creations, while picture frames or mounting hardware complete the professional presentation.
Step-by-Step Guide: Creating Your First Masterpiece
Step 1: Choose Your Boho Style Direction
Start by identifying which bohemian aesthetic speaks to your soul. Moroccan-inspired prints feature intricate geometric patterns and warm earth tones. Southwestern boho embraces desert landscapes with cacti, mesas, and sunset colors. Mandala designs offer meditative circular patterns that promote tranquility.
Step 2: Design Planning and Sketching
Spend 15-20 minutes sketching your basic composition on scrap paper. This planning phase prevents costly mistakes and ensures balanced, pleasing results. Consider the rule of thirds – placing focal elements along imaginary lines that divide your canvas into nine equal sections creates naturally appealing compositions.
Step 3: Base Layer Creation
Apply your background color using broad, confident strokes. Light, neutral backgrounds like cream or soft beige provide excellent foundations for layered designs. Allow 20-30 minutes drying time between layers to prevent unwanted color mixing.
Step 4: Add Core Design Elements
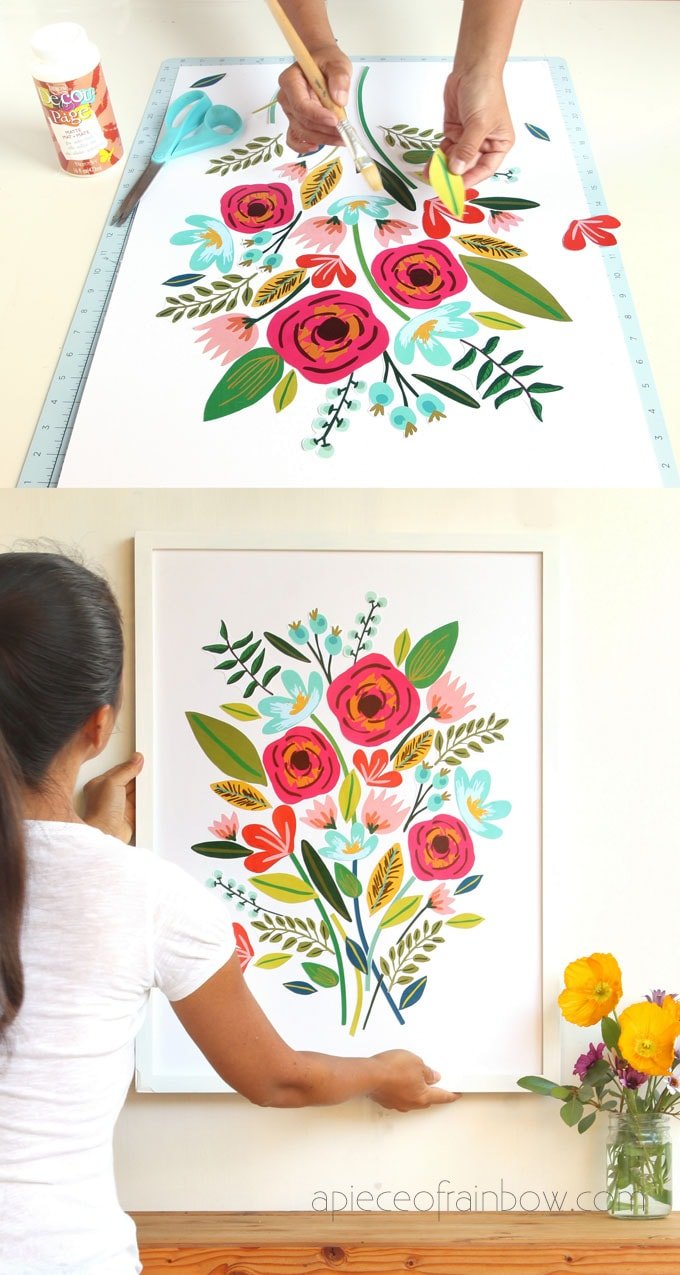
Now comes the exciting part – bringing your vision to life! Use stencils for precise geometric patterns, or embrace freehand techniques for organic, flowing designs. Work from light to dark colors, building complexity gradually.
Step 5: Final Details and Texturing
Add finishing touches that elevate your print from amateur to professional quality. Dry brushing creates weathered, vintage effects. Splatter techniques add dynamic energy. Gold leaf accents provide luxurious highlights that catch light beautifully.
Frequently Asked Questions
Simple designs require 2-3 hours, while complex pieces may need 6-8 hours across multiple sessions. Remember, rushing compromises quality – embrace the meditative creative process.
Boho style celebrates imperfection! Slightly uneven lines and organic variations enhance authenticity. Start with simple geometric patterns or use stencils for guidance while building confidence.
Absolutely! Try collage techniques using decorative papers, fabric scraps, and pressed flowers. Digital printing of your own photography with boho filters also creates stunning results.
Start with 11×14 or 16×20 inch canvases – they’re manageable for beginners yet large enough to make visual impact. Create gallery walls using multiple smaller pieces for dramatic effect.
Study traditional textiles and pottery from Morocco, India, and the American Southwest. Earthy, muted tones work better than bright, artificial colors. Mix your own shades by adding small amounts of brown or gray to pure colors.
Advanced Techniques for Stunning Results
Layering and Depth Creation
Professional-looking boho prints rely heavily on layering techniques that build visual depth. Start with washed backgrounds, add mid-tone patterns, and finish with dark accent details. Each layer should partially show through subsequent ones, creating rich, complex surfaces.
Incorporating Natural Elements
Authentic boho style draws inspiration from nature. Press real leaves and flowers into wet paint for organic textures. Use salt on watercolor washes to create crystalline effects resembling desert minerals. Sand mixed into paint provides gritty, earthy textures.
Color Harmony Strategies
Successful boho prints typically use analogous color schemes – colors that sit next to each other on the color wheel. Think sunset progressions from yellow through orange to red-brown, or ocean transitions from blue-green through blue to purple.
Common Mistakes to Avoid
Overcrowding Designs: New creators often add too many elements, creating visual chaos. Remember that negative space provides crucial breathing room that lets key elements shine.
Using Wrong Paint Consistency: Thin, watery paints create weak, translucent coverage, while thick, undiluted paint obscures underlying layers. Aim for honey-like consistency that flows smoothly but maintains opacity.
Ignoring Composition Balance: Randomly placed elements look amateurish. Use odd numbers of focal points (groups of 3 or 5 work beautifully), and vary sizes for dynamic visual rhythm.
Displaying Your Creations Like a Pro
Gallery Wall Arrangements: Plan your layout on the floor before hanging anything. Maintain 2-3 inches between frames for cohesive groupings. Mix sizes while keeping a consistent color palette throughout.
Lighting Considerations: Avoid direct sunlight that fades colors over time. Use picture lights or strategically placed lamps to highlight your artwork’s textures and details.
Frame Selection: Natural wood frames complement boho aesthetics perfectly. Alternatively, go frameless with gallery-wrapped canvases for modern bohemian appeal.
Turning Creativity Into Income
Many DIY enthusiasts discover their boho prints attract friends’ admiration and purchase requests. Consider these monetization strategies:
Local Markets and Craft Fairs: Test demand at weekend markets where boho style enjoys strong popularity. Price pieces at $25-75 depending on size and complexity.
Social Media Sales: Instagram and Facebook provide excellent platforms for showcasing and selling your creations. Use hashtags like #bohoart and #handmadedecor to reach interested buyers.
Custom Commission Work: Offer personalized prints matching clients’ specific color schemes and room dimensions. Custom work typically commands 50-100% premium pricing.
Conclusion
Creating your own boho prints transforms more than just your walls – it awakens your inner artist and connects you with centuries-old traditions of handmade beauty. Every piece you create carries your unique creative fingerprint, making your home a true reflection of your personality and artistic journey.
Don’t wait for the perfect moment or worry about making mistakes. Gather your supplies, embrace the creative process, and start making magic happen on canvas. Your walls are waiting for the personal touch that only you can provide.
Remember, the most beautiful boho prints aren’t necessarily the most technically perfect ones – they’re the ones that speak to your soul and bring you joy every time you see them. Start creating today, and watch as your home transforms into the bohemian sanctuary of your dreams.