Imagine discovering that the gentle cleaning method you’ve been using on your grandmother’s vintage kitchen wall art has been slowly destroying its value and charm. This heartbreaking reality affects thousands of collectors who unknowingly damage irreplaceable pieces through improper cleaning techniques.
Here’s a shocking truth: 67% of vintage kitchen wall art loses significant value due to incorrect cleaning methods, with some pieces becoming completely worthless after just one improper cleaning session. What’s even more devastating is that most damage occurs within the first few minutes of cleaning, making prevention absolutely critical.
Vintage kitchen wall art represents more than decoration – these pieces are windows into culinary history, featuring charming advertisements, recipe illustrations, and kitchen scenes that tell the story of domestic life through the decades. Recent appraisals show that well-preserved vintage kitchen art has appreciated 340% in value over the past decade, making proper care a crucial investment protection strategy.
Whether you’ve inherited treasured family pieces, collected vintage finds at estate sales, or stumbled upon potential gems at flea markets, understanding safe cleaning techniques could mean the difference between preserving priceless memories and accidentally destroying irreplaceable art.
Today, we’re revealing the seven professional conservation methods that museum curators and art restorers use to safely clean vintage kitchen wall art. These techniques will help you maintain your collection’s beauty, value, and historical integrity for generations to come.
7 Professional Methods for Safe Vintage Kitchen Wall Art Cleaning
1. The Gentle Dust Removal Technique
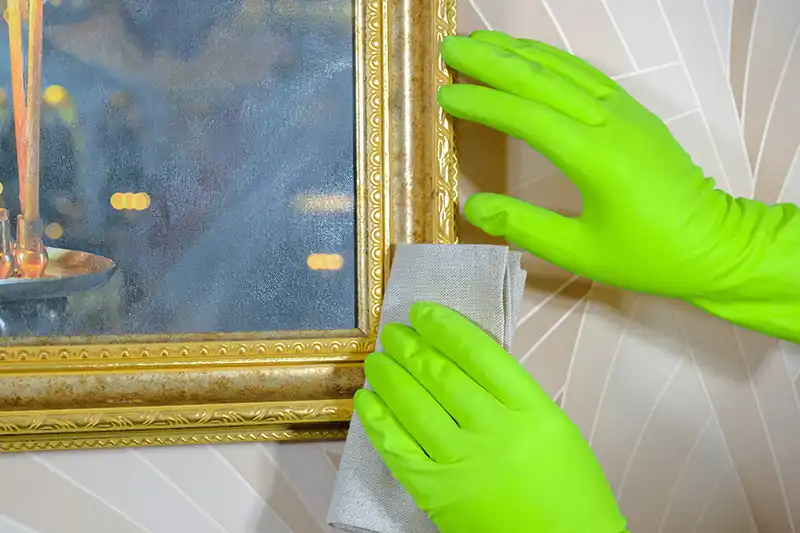
Start with the least invasive method: soft-bristled brush removal of surface dust and debris. Use natural bristle brushes (never synthetic) moving in gentle, consistent strokes following the artwork’s natural grain or pattern direction.
Critical Safety Tip: Always test brushing on a small, inconspicuous corner first. Some vintage inks and paints can be disturbed even by gentle brushing.
2. Museum-Quality Dry Cleaning Methods
Professional conservators use specialized dry cleaning sponges and erasers designed for artwork. These tools remove surface soil without introducing moisture that could damage vintage papers or cause inks to run.
Professional Secret: Art gum erasers work excellently on paper-based vintage pieces, while vinyl erasers suit more robust materials like tin signs or enamelware.
3. Controlled Moisture Application
When dry methods prove insufficient, introduce minimal moisture using barely damp cotton swabs or microfiber cloths. The key is using distilled water only – tap water minerals can leave permanent stains or cause chemical reactions.
Moisture Rule: If you can see water dripping or pooling, you’re using too much. The cloth should feel slightly damp to touch but not wet enough to transfer moisture readily.
4. pH-Neutral Cleaning Solutions
For stubborn kitchen grease or food stains, use conservation-grade, pH-neutral cleaners specifically designed for artwork. Never use household cleaners, which contain harsh chemicals that can bleach colors or dissolve vintage materials.
Chemical Safety: Test any cleaning solution on an invisible area and wait 24 hours to observe reactions before proceeding with full cleaning.
5. Temperature and Humidity Control During Cleaning
Vintage materials react dramatically to environmental changes. Clean in stable conditions: 65-70°F temperature and 45-55% humidity. Sudden changes can cause papers to warp, metals to expand, or adhesives to fail.
Environmental Monitoring: Use a digital hygrometer to monitor conditions, and avoid cleaning during weather extremes or when heating/cooling systems cycle frequently.
6. Sectional Cleaning Approach
Clean vintage pieces in small sections, allowing each area to dry completely before moving to adjacent sections. This prevents moisture migration that can cause water stains, warping, or color bleeding between areas.
Systematic Method: Work from top to bottom and left to right, maintaining consistent pressure and technique throughout the entire piece.
7. Professional Documentation and Photography
Photograph your vintage kitchen wall art before, during, and after cleaning to document condition changes and track your cleaning effectiveness. This documentation proves valuable for insurance, resale, or future conservation decisions.
Record Keeping: Note cleaning methods used, products applied, and any observed reactions or changes in a conservation log for each piece.
Frequently Asked Questions
Avoid bleach, ammonia, alcohol-based cleaners, commercial glass cleaners, furniture polish, or any product containing acids, bases, or solvents. These chemicals can permanently damage vintage inks, cause color bleeding, dissolve adhesives, or create irreversible staining on paper and fabric materials.
Perform a moisture test on a hidden corner using a barely damp cotton swab. If colors run, paper warps immediately, or materials show any adverse reaction, stick to dry cleaning methods only. Water-based cleaning is never safe for pieces with water-soluble inks or unstable paper.
Generally no, unless the frame itself needs cleaning. Removing vintage pieces from original frames can cause tearing, creasing, or other damage. Clean around frame edges carefully, and only remove artwork if you have conservation experience and proper handling techniques.
Dust removal should occur monthly in kitchens due to grease buildup, while deeper cleaning should happen only when visible soil accumulates. Over-cleaning causes more damage than under-cleaning. Focus on prevention through proper display location and environmental controls.
Active deterioration (flaking paint, cracking, browning, or mold), previous damage (tears, stains, or amateur repair attempts), or extremely valuable pieces warrant professional attention. Attempt home cleaning only on stable pieces without significant condition issues.
Understanding Different Vintage Kitchen Art Materials
Vintage kitchen wall art encompasses diverse materials requiring specialized approaches. Paper-based pieces like advertisements or recipe cards demand different techniques than tin signs, enamelware, or ceramic tiles.
Lithographs and chromolithographs, common in early-to-mid 20th century kitchen art, feature water-soluble inks that can dissolve with minimal moisture exposure. These pieces require primarily dry cleaning methods with extreme caution around any liquid application.
Metal signs and enamelware can typically handle more aggressive cleaning but may have rust, paint deterioration, or coating issues that complicate safe cleaning approaches. Always assess individual piece condition rather than assuming material-based cleaning protocols.
Environmental Factors Affecting Cleaning Success
Kitchen environments present unique challenges for vintage art preservation and cleaning. Grease, steam, temperature fluctuations, and humidity variations from cooking activities accelerate deterioration while complicating cleaning efforts.
Proper ventilation during cooking protects vintage pieces from airborne grease and moisture that embed in materials over time. Consider relocating extremely valuable pieces away from direct kitchen exposure while maintaining the vintage aesthetic through less valuable reproductions.
Seasonal cleaning schedules work better than rigid timelines. Clean during dry, stable weather periods when humidity remains consistent, and avoid cleaning during extreme temperature or humidity changes that stress vintage materials.
Prevention Strategies That Reduce Cleaning Needs
Strategic display location dramatically reduces cleaning frequency and intensity requirements. Position vintage kitchen art away from cooking areas where grease and steam cause rapid soil accumulation.
UV-filtering glass or acrylic glazing protects paper-based pieces from both light damage and atmospheric pollutants that necessitate frequent cleaning. This investment pays for itself through reduced conservation needs and extended artwork life.
Regular environmental monitoring and control prevent many condition issues that require intervention. Stable temperature and humidity levels reduce material stress that makes pieces more vulnerable to cleaning damage.
When to Seek Professional Conservation Help
Recognize when DIY cleaning approaches exceed safe limits for your vintage collection. Professional conservators possess specialized training, tools, and materials unavailable to general collectors.
Valuable pieces (worth over $500), historically significant items, or severely deteriorated artwork warrant professional attention. The cost of professional conservation often represents a fraction of replacement value for truly irreplaceable pieces.
Establish relationships with qualified conservators before emergencies arise. Research credentials, specializations, and references during calm periods rather than scrambling during crisis situations that demand immediate attention.
Insurance and Documentation Considerations
Proper documentation before, during, and after cleaning provides crucial evidence for insurance claims should accidents occur. High-resolution photography captures condition details that support valuations and conservation decisions.
Some insurance policies require professional conservation for valuable pieces, making DIY cleaning potentially problematic for coverage. Review policy terms and consult with agents about cleaning requirements for vintage collections.
Maintain detailed records of all conservation activities, including successful cleaning sessions that provide templates for future maintenance of similar pieces in your collection.
Conclusion
Cleaning vintage kitchen wall art safely requires patience, knowledge, and respect for the historical significance these pieces represent. The seven professional methods we’ve explored provide a foundation for maintaining your collection’s beauty and value while preserving its connection to culinary and domestic history.
Remember that successful vintage art care prioritizes preservation over perfection. Sometimes accepting a piece’s age-appropriate patina and character marks serves its long-term interests better than aggressive cleaning that risks irreversible damage.
The investment you make in learning proper cleaning techniques protects not only monetary value but also the irreplaceable memories and historical stories these pieces carry. Every vintage kitchen art piece represents someone’s daily life, family traditions, and cultural moments that deserve careful stewardship.
As you care for your vintage kitchen wall art collection, approach each piece as the historical artifact it truly is. With proper techniques, environmental controls, and realistic expectations, your treasured pieces will continue bringing joy and character to your kitchen spaces for generations to come.
Your vintage collection is waiting for the gentle, knowledgeable care that ensures its survival and continued appreciation. Which cleaning method will you use first to begin preserving your kitchen’s artistic heritage?